With my initial build, I’ve always intended to expand my Closed Loop system to an Open Loop.
Closed Loop being an All in one CPU water cooler.
Open Loop being a customized water cooling system with the ability to expand, drain and clean the system.
Because of this I had picked up a Cooler Master Glacer 240L. Mostly because it had the exact pump/CPU block that I was already shopping for, but for less money and included a 240mm radiator. This tided me over until I managed the funds to expand.
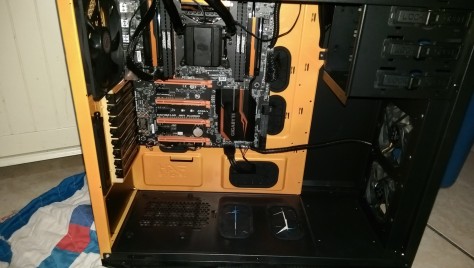
The base system (view previous build log for more detail) is as follows:
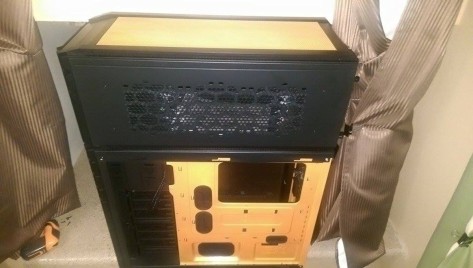
Coolermaster HAF Stacker, custom painted by Redmax of http://www.hardwareasylum.com (Orange and black)
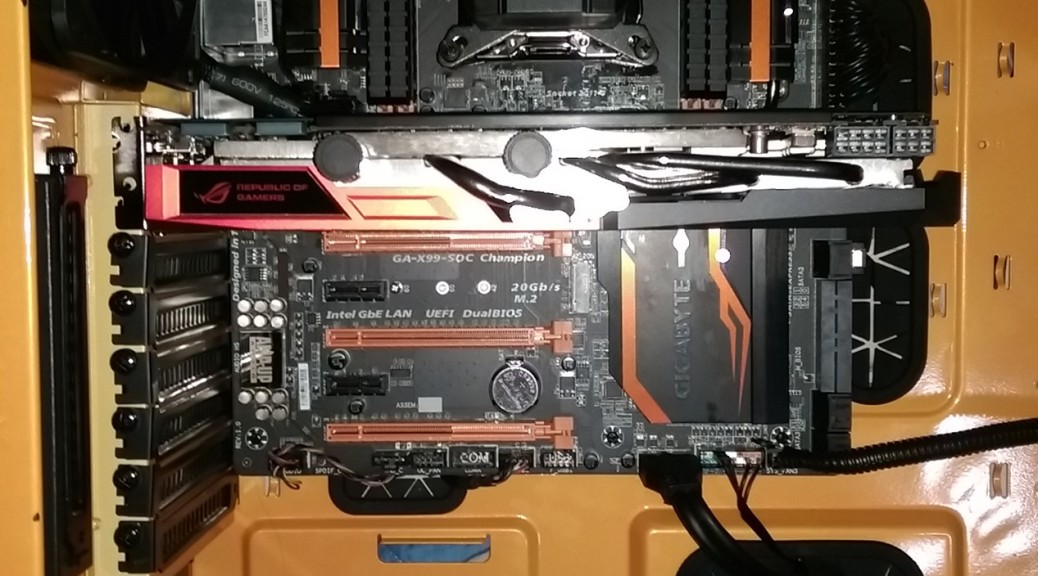
Gigabyte X99-SOC-Champion Motherboard
i7-5930K Intel Processor
4x4GB G.Skill Ripjaws4 Black 3000mhz DDR4 Memory
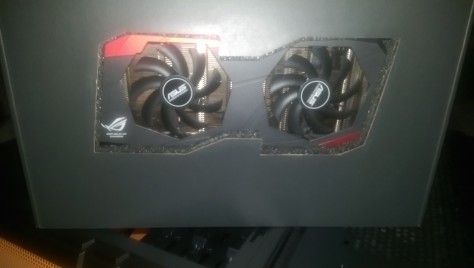
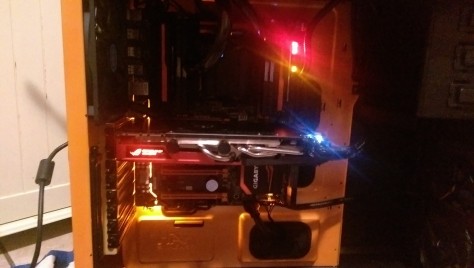
Asus Poseidon GTX 980 Platinum Video Card
240GB Mushkin Eco2 SSD (Primary SSD for OS and programs)
3TB Toshiba HDD (Music and Media storage0
2x 480GB Sandisk Ultra 2 SSDs (Game storage)
The items that I haven’t previously been able to add didn’t just include expansion on the watercooling, but also a second GTX 980. This has now been ordered as well.
So far the system has been okay, especially performance-wise, but I have been having either processor or motherboard issues. I have just received my third chip and it will be newly installed with this upgrade. It may be a motherboard related issue, as I noticed a discoloration on a section of LGA (Landing Grid Array, where the processor sits) pins. I have decided I will use a toothbrush and fast evaporating cleaning liquid to softly brush these pins to restore them to match the rest of the array.
I have decided to go with hard line or rigid piping to carry the water cooling fluid. I intend to use an Ultraviolet active Orange fluid.
Based on my much more experience friend, Redmax, I have decided to place my Water cooling purchase through http://www.performance-pcs.com. I also selected them because they aren’t too far from me, saving me the costs of shipping for a couple of hours of driving.
For now, I have ordered all of the necessary parts. Below is the listing of the parts that will be used and some insight as to why I made my choices.
FrozenQ LF Reaction 400mm Reservoir – Black Helix
Initially I was considering the FrozenQ Limited Edition Reactor Reservoir, but the black was out of stock. I then looked at the Helix line, I was impressed with the effect. The coolant flows up through the helix and spills from the top, providing a bubbling/fountain effect. In addition it includes a cathode (ultraviolet) light, to bring out the color in the coolant.
Hardware Labs Black Ice SR2 Multiport Black Carbon Radiator – 360mm
In this case, I was considering the Black Ice SR1, mostly because it is on sale and partly because I have faith in the brand. As I researched it, I realized that the SR2 had supremely better performance and this version has several ports. The extra ports enable the ability to bleed, fill and drain the system from the radiator.
Monsoon Hardline All Pro Deluxe Bender Kit 3/8 x 1/2 (13mm)
With the Bender Kit, I realized that i didn’t own a lot of the items necessary to shape the tubing. With this kit, I get all of the necessary tools and a handy case in which to carry them.
PrimoChill 1/2in Rigid PETG Tubing – 36in – Clear (4 Pack)
While researching hard line, I discovered that using PrimoChill Fittings will eliminate a lot of the adjustments that will need to be made to the tubing in order to help it fit in the fitting without damaging the tubing or the seal of the fittings. With this in mind I went with PrimoChill for all of the tubing and fittings. In addition, I went with a lot of tubing, to give myself the opportunity to screw up and possibly have some left over for other people’s systems in future projects.
PrimoChill 1/2in Rigid Acrylic Tubing – 24in – Clear (12 Pack)
Rigid Revolver Compression Fitting 3/8″ x 1/2″ Straight Knurled 10 Pack – Anodized Black
I was initially looking at “regular” Rigid Compression fittings. As I looked closer I realized that these “Revolvers” look much sweeter. I then checked a few reviews and discovered that they are even friendlier for the Tubing itself and easier for install. Sold!
Mayhems Biocide Extreme
A Biocide is necessary to keep algae and other living things from spawning in the water cooling system. This kit covered all of the bases and includes Ph testing, which makes it even easier.
Mayhems Silver Coil 99.999 Pure Fine Silver
This is probably overkill, but silver is a natural aglaecide/antibiotic. By inserting these coils in the tubing it will help further protect the system from any kind of living thing moving in and prohibiting cooling or clouding the looks of the coolant.
Mayhems Blitz Pro Cleaning System
Did I say overkill? Well, I have to make sure the CPU waterblock is clean and at some point I will have to change out the coolant, so maybe this is just thinking ahead.
PrimoChill Base High Purity Deionized Water – 32oz – Brite Orange
This is premixed, UV active coolant. I picked up 2L to cover the system and be sure I have enough.
Thermaltake Ring 12 High Static Pressure LED Radiator Fan – Orange
The parts will be ready for pick up on Monday, so I’ll probably run to Palm Bay on Tuesday and get this stuff together. Then the fun begins! With pictures!


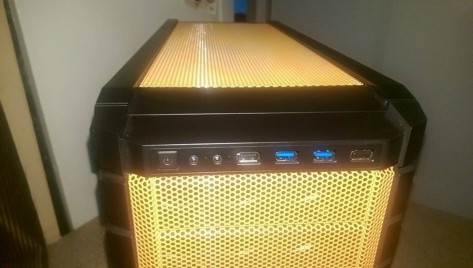
 Front Panel, when installed on mid-tower (it is removable and able to be installed on mini-ITX).